High-End Retouching Image
Posted on 1 year, 1 month agoHigh-end retouching in the context of image editing refers to the meticulous process of enhancing and refining images to an extremely high standard. It is typically used in industries like fashion, beauty, advertising, and editorial photography where the highest quality and a flawless finish are required. This process goes beyond basic photo editing and involves intricate techniques to ensure that the final image is both aesthetically pleasing and technically perfect.
What is High-End Retouching?
High-end retouching is the art and science of improving the visual appeal of an image by making detailed adjustments. It focuses on enhancing the subject's natural beauty while maintaining a realistic look, avoiding an over-processed appearance. This type of retouching is often applied to portrait photography, product images, and commercial shots where precision and quality are paramount.
Key Characteristics of High-End Retouching:
- Attention to Detail: Every aspect of the image is carefully examined and refined, from skin texture to background elements.
- Realism: The goal is to enhance the image without making it look fake or unnatural.
- Advanced Techniques: Utilizes sophisticated methods such as frequency separation, dodging and burning, and color grading.
- Non-Destructive Editing: Changes are often made in a way that preserves the original image, allowing for adjustments without degrading quality.
How High-End Retouching Works
The process of high-end retouching involves several steps, each aimed at improving specific aspects of the image. Here's a breakdown of the key stages:
1. Assessment and Planning
- Analyze the Image: Determine areas that need enhancement, such as skin imperfections, lighting issues, or distracting background elements.
- Define Goals: Understand the intended look and feel, which may involve consulting with clients or creative directors.
2. Raw Conversion
- Adjust Exposure and White Balance: Ensure the image has the correct lighting and color tones.
- Highlight and Shadow Details: Recover details in overexposed or underexposed areas.
3. Skin Retouching
- Blemish Removal: Use tools like the Healing Brush and Clone Stamp to remove imperfections such as pimples, scars, and stray hairs.
- Skin Smoothing: Apply frequency separation to smooth skin while preserving texture, avoiding a plastic-like look.
- Dodge and Burn: Lighten and darken specific areas to enhance facial contours and give depth to the image.
4. Hair and Eyes
- Enhance Eyes: Brighten the whites of the eyes, sharpen the iris, and remove red-eye or reflections.
- Refine Hair: Clean up stray hairs and add volume and shine to hair while maintaining natural flow.
5. Color Grading and Correction
- Adjust Colors: Use color correction tools to balance skin tones and adjust the overall color palette.
- Add Effects: Apply color grading to create a specific mood or aesthetic.
6. Final Touches
- Sharpening: Increase the clarity and detail of the image, particularly in key areas like the eyes and lips.
- Vignetting: Apply subtle darkening around the edges to draw attention to the subject.
- Review and Fine-Tuning: Carefully inspect the image for any remaining issues and make final adjustments.
7. Output
- Save in Desired Format: Export the image in the appropriate format for its intended use, such as high-resolution TIFF for print or optimized JPEG for web use.
Tools and Techniques
High-end retouching requires specialized software and tools to achieve the desired results. Some of the most commonly used tools and techniques include:
Software
- Adobe Photoshop: The industry standard for retouching, offering a wide range of tools and features for detailed image editing.
- Capture One: Known for its superior color grading and raw processing capabilities.
- Affinity Photo: An alternative to Photoshop with powerful retouching features.
Techniques
- Frequency Separation: Separates the image into texture and color layers, allowing for precise adjustments to each.
- Dodge and Burn: Used to enhance highlights and shadows, adding depth and dimension to the image.
- Liquify Tool: Allows for reshaping and adjusting features without losing quality.
Tools
- Healing Brush and Clone Stamp: Essential for removing blemishes and imperfections.
- Adjustment Layers: Non-destructive layers for adjusting colors, brightness, and contrast.
- Masking: Enables selective editing of parts of the image without affecting the whole.
Applications and Examples
Fashion and Beauty
- Model Portfolios: Enhancing skin, hair, and makeup while maintaining a natural look.
- Editorial Shoots: Creating striking images that align with the publication's aesthetic.
Product Photography
- E-commerce: Ensuring products look their best with perfect lighting, color, and texture.
- Advertising: Creating visually compelling images that attract customers and convey brand quality.
Commercial and Advertising
- Billboards and Print Ads: High-resolution, flawless images that grab attention and convey professionalism.
- Brand Campaigns: Consistent, high-quality images that reflect the brand's identity and message.
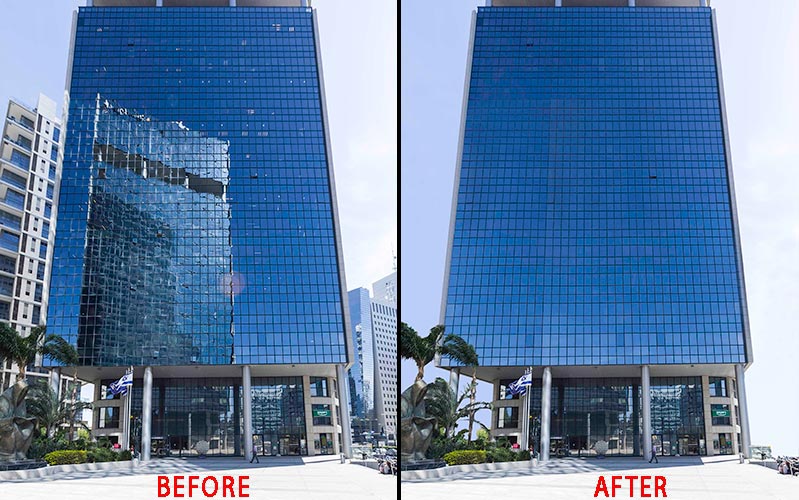
Before and After Examples
Skin Retouching
- Before: Visible blemishes, uneven skin tone, and texture issues.
- After: Smooth, even skin with natural texture maintained.
Product Retouching
- Before: Uneven lighting, dust spots, and color discrepancies.
- After: Clean, well-lit, and color-accurate representation of the product.
Conclusion
High-end retouching is a crucial skill in various visual industries, providing the means to create impeccable images that meet the highest standards of quality. It involves a combination of artistic vision and technical expertise, using advanced tools and techniques to enhance and perfect images in a way that looks both natural and impressive. Whether for fashion, beauty, commercial, or product photography, high-end retouching ensures that the final images are flawless and ready for professional presentation.